
In my previous post, I looked at a number of Print on Demand (POD) companies that can be used for selling artwork on t-shirts and gifts. In that post, I briefly mentioned Redbubble but up until now, I’ve not had any direct experience with Redbubble.
However, I am currently setting up an account so that I can help a photographer showcase his work on the Redbubble site, and of course, then be in a position to sell his work. He has the creative tools he needs, a professional camera and Photoshop, but he now needs a vehicle that will allow him to promote his work. And Redbubble is that vehicle.
Now, of course, Redbubble is for artists, designers, slogan writers as well as for photographers.
And the good news is that it is free to join.
Are you creative? Check out RedBubble …
… where you can exhibit and sell your art to the world – for FREE!
This post outlines how to get started with Redbubble and covers:
- How to set up an account on Redbubble and start selling your designs and artwork
- Your dashboard on Redbubble
- Tools at your disposal
- How to upload your images and photography to sell on products
- Redbubble Collections
- FAQs about Redbubble
- Displaying your Redbubble shop on your own website
- And much more
Find awesome t-shirts, ipad and iphones cases, cards, posters and more
The Photographer’s Quick Guide to Earning Money From Your Photos (Volume 1)
So here is a simple straight-forward tutorial to show you how to start selling on Redbubble if you are keen to try out this platform as a way of making some additional money online:
Setting Up an Account on Redbubble to Start Selling
- Load www.redbubble.com .
- Click on Sign In (top right corner). This is in a very small font in some browsers so you might need to look closely to find it.
- On the next page you have the option to Sign In (if you already have an account) or to Sign Up. Naturally it is the latter first time round. Decide on a username.
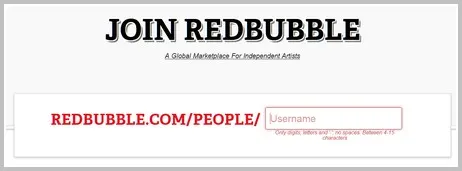
The next screen will prompt you to complete your payment details but before you do so, you will have to confirm your email address.
There are a number of options here, including your preferred payment currency. You’ll also see that the default threshold, before you can be paid, is only $20 for some payment options, $100 for others.
If anything changes in the future you can return to your profile and update your payment details.
Now you have your very own ‘place’ in the Redbubble world.
From within your account, you can access:
- Your Profile
- Your Portfolio
- Your Shop
- Artist Tools
- etc.

How to Design and Sell T-shirts: Making Money with Design Your Own T-shirt
Exploring Your Redbubble Site
Your Redbubble Account
In the top right hand corner, you’ll see your avatar and a drop down list.
If you haven’t yet loaded your avatar, you’ll see the default:
I like this drop down menu. The options are all very self-explanatory.
-
Your Avatar
This image will appear to the left of your name or username at the top of your account pages. You can choose your photo or you can choose a different image to represent you.
From the left menu that shows Account Details, click Your Avatar. Follow the prompts to load a file from your computer. There is no restriction on size; it will be cropped and reduced by the system to suit the avatar requirements.
-
Your Profile
If you click on Edit Profile, under Account Details, you can make any required changes.
Choose now whether you prefer your real name or your username to appear at the top of your pages.
Artist Tools
If you look at the menu options to the left you should be able to see a menu link for Artist Tools. If you can’t see it, then click on the drop down in the top right hand corner of the screen to access your Account Details. Then the Artist Tools option will appear.
-
Product Pricing
Here you can see the default markup (20% at the time of writing this post) and this of course can be changed if you prefer something different in the future.
-
Google Analytics
I highly recommend that you follow the suggestions provided under this link.
Once you set up your ID from Google Analytics, you’ll be able to track how many people have visited your designs and artwork, which pages are the most popular, how long visitors spent browsing your content etc.
You can come back and enter this information at a later date but as soon as you have some designs up, I would encourage you to do so straight away.
-
Sales History
This will be one of your favourite links, especially once you start to make a few sales.
-
Other Links
The other links are fairly self-explanatory. Explore each of them at your leisure.
Load Your First Design
I suggest that you name each file to be uploaded with a descriptive word or phrase that can help your work to be found and can help you quickly identify which file you have uploaded etc.
I must say that Redbubble has made the uploading of designs extremely easy.
Steps When Uploading a Design or Photo
- Upload Image
Simply click on the drop down menu near your avatar (top right) and click on Add New Work.
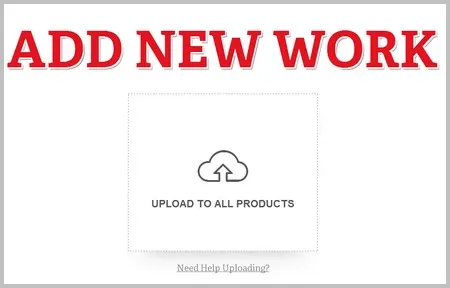
There is a link beneath the upload section that gives you additional help with uploading your designs. This is where you can get the required dimensions for the various product types. I suggest keeping this dimensions page handy; you could bookmark it.
- Enable/Disable Products
Once your image loads, scroll through each of the product types and Disable the product types that your image is not suited to and/or edit each product type. You can replace the uploaded image with a different image dimension or style when you edit a specific product type.I found this guide extremely useful and a guide that answered most of my questions the first time I tried uploading a design.
- Edit Positioning and Size
You can edit enabled products to make sure the image is centered and fits within the guides. A nifty slider allows you to reduce the image size. - Choose Product Availability
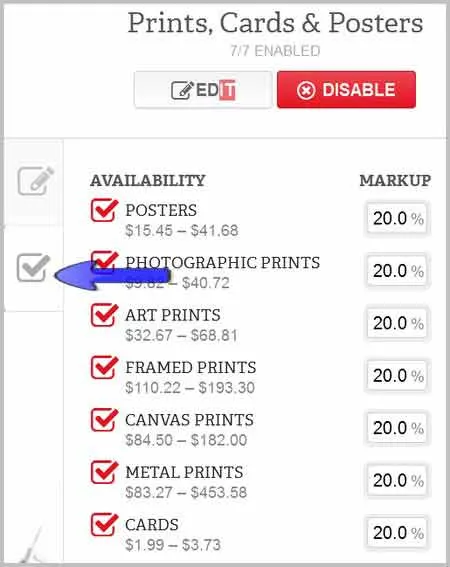
You can also edit each product category and choose which products you want your design to appear on, within that category.For example, in the Prints, Cards & Posters category you can be selective in your offering or simply decide to offer each of the product types:
- Title
Choose a title for your design/photo. - Description
Enter a couple of sentences describing your design/photo. - Tags
This is a very, very important task. You are allowed to enter up to 50 search terms (tags). These tags or keywords will trigger searches in the Redbubble marketplace. For example, if you have uploaded a photo of a Maltese dog and one of your tags is the phrase fluffy maltese, then your photo can be in the search results if someone searches for fluffy maltese.You want to think of descriptive tags that are not too generic. The tag maltese, for example, is too general which would mean that your design would have too much competition from other similar designs.
- Media
Tick the 2 media types that best describe your uploaded image. - Collections
If you already have created some collections (categories) then you can now allocate your newly loaded image to the best collection(s). - Default View
Next, you can choose the default item view that will appear in the marketplace. - Public and Content Type
The remaining questions are self-explanatory. - Save
Save your work and view how it looks on the items you have enabled. If a given design looks wrong on an item, you can return and edit the sizing and positioning.
Not only is it very easy to upload your design and have it show up on many products, the system is so fast. No waiting for your design to appear several hours later on a t-shirt or mug, no waiting to have your design vetted for approval.
Don’t panic if it takes a few minutes for your image to show up on your Shop page. You will be able to see it on your Profile page straight away but it might take a little longer, if it is a large image, to show up on the Portfolio page and then the Shop page.
The first design I uploaded was a Koala design and within minutes it was visible to customers.

Selling Your Photography
When you upload any design (Add New Work), you can then go through the product categories and Disable any you are not interested in. For example, if you are a photographer you might be solely interested in showcasing your work in the Print, Cards & Posters section. In that case, you would disable Clothing & Stickers etc.
You can of course, change your mind in the future. If you decide that a photo is selling well, you can always edit your design and add it to other products offered by Redbubble.
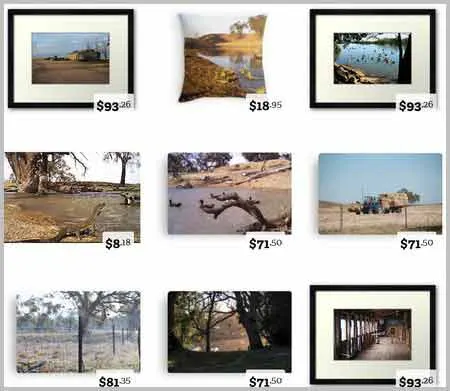
As mentioned above, you can also choose which product type will be showcased first in your Shop. For example this shop displays Framed Prints, Throw Pillows and other Canvas Prints:
Collections
Similar to categories that you might have come across on other POD companies, Redbubble offers Collections. Collections allow you to group your designs under a particular theme, in other words categorize your designs.
How to Create a Collection
- Make sure your Portfolio page is loaded, in edit mode.
- Click on New Collection (left menu)
- Give this Collection a name, save it and you will then see it listed in the left menu.
- If loading new images, you can see the collection names listed at the bottom of the editing screen. Choose the one you want.
- If you have a design that you want to move into an existing collection, after it has been created, simply click on the design and look for the Edit link to the right. Scroll down to the bottom of the page and click on the collection that you are after and then save.
Alternatively, from the Portfolio page, you can drag a design across to the chosen Collection listed on the left.
I love the fact that you can add a given design to different collections. I also like the fact that you can order, re-order, edit, highlight and feature a given collection etc. etc.
You can have up to 30 collections assigned to 1 profile. But it is easy enough to re-categorise designs and themes to fit within this limit.
Promoting Your Site
This is a critical component to your success. You can gain traction through the Redbubble marketplace but you really need to promote your shop to drive traffic to it.
Let it be known via your business cards, your emails, word of mouth and of course via social media. You can check some traffic ideas here.
The Buyer’s View
When a potential customer clicks through to your design, many product types are often displayed in context.
For example, the throw pillows are displayed like this:

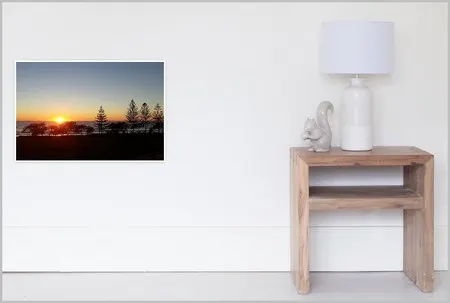
And posters are presented like this:
FAQs About Redbubble
Here is a list of questions that are often asked by designers when they first start out with Redbubble.
How can I edit my profile?
When you want to edit any of the pages in your account (Profile, Portfolio, Shop), you can load the page and then look for the Edit link to the right/
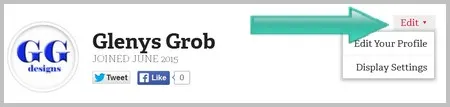
This will give you a drop down list of options that are modifiable on that page.
How am I paid when I earn a commission?
At the moment you are provided with 3 options (each has their own commission threshold):
- PayPal
- By Cheque / Check
- Direct Deposit into a bank account.
Is my UserName displayed to the public?
Choose your UserName carefully because it can’t be changed later.
Your UserName is your login name and is also displayed in your profile URL:
If someone clicks on your avatar they will be taken to:
http://www.redbubble.com/people/yourusername
In your profile settings you have the choice of displaying your UserName at the top of your pages or your real name.
You can see this in the screenshot above, where I have elected to display my real name.
What is the first screen that the public see when they click on my handle?
They will first see the Portfolio screen.
If you are logged in, you can quickly see this view by clicking Portfolio from the top right drop down. You also have editing options from this screen as well if you are logged in.
Why is my uploaded image not appearing on my Shop page?
If you have uploaded a large image, it can take a few minutes for it to appear in your Shop. Images tend to show up very quickly on your Profile, then on your Portfolio page and lastly in your Shop.
How can I add an image to my Profile bio?
There are a couple of ways to do this::
- If you would like to highlight one of your images already uploaded:
- Click on the image to load it.
- Right click on the image (should see a popup menu of lots of options).
- Choose Copy link location.
- Now return to your Profile page and click Edit to add to your bio write up.
- In the position where you want the image, paste your saved URL and include an exclamation mark at the beginning and the end of the URL like so:
!CopiedImagePath!
- If you want to include an image in your Portfolio bio but one that you don’t want to load on items for sale, then:
- Load this image as usual.
- Scroll to the bottom of the page and look for Who Can View This Work?
- Select Only You (Private) and save.
- To include this image in your Profile bio, follow the guidelines in the previous step from Copy Link Location.
Where can I find an image that I have hidden from public view?
Simply click on the drop down to the right of your avatar (top right) and select Manage Portfolio. You’ll see a padlock on the images that you have hidden from public view.
Does Redbubble Send Out Sales Notifications by Email?
Yes, and what a nice email message it is!! There’s hardly anything more exciting for a seller/designer than receiving an email letting you know that someone liked your design enough to purchase it. You never get tired of seeing the “You’ve Made a Sale” notice in your inbox.

Displaying Your Redbubble Shop from Your Own Website
If you have your own website, Redbubble provides code that you can embed in your pages.
Click on Account Details and then Promote (under Artist Tools). Here you will see the code that you can copy and paste. It automatically updates the display to show your latest work.
Tools for Artwork & Photography
The one tool that I have used for years and continue to use for my digital art, as well as for editing and resizing photos, is Adobe Photoshop.
If you are just starting out with PhotoShop, you might find this online course very helpful:
Photoshop for Photographers
(affiliate link)
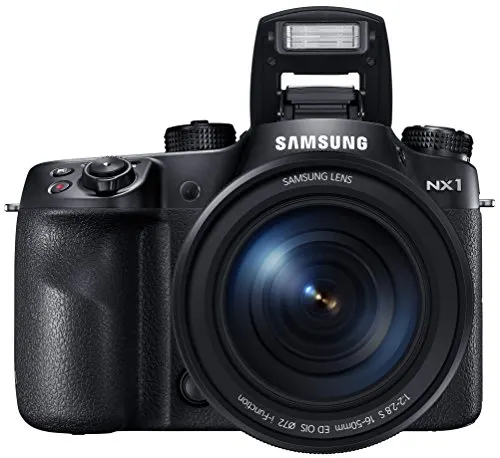
And of course, if you are a photographer as well, then you want to make sure that you have the right camera that will produce the quality of work you are aiming for.
Other Ways to Make Money from Your Photos & Artwork
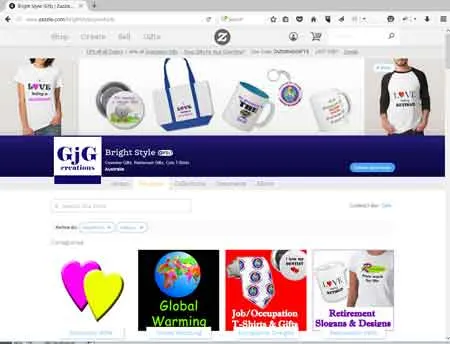
There are other POD companies that you might like to explore as well. I really enjoy showcasing my art and designs via a shop I have created on Zazzle:
And here are some very useful books and guides that are available on Amazon, each addressing the topic of making money from your photos or your artwork etc.:
99 Ways To Make Money From Your Photos

Sell Your Artwork & Crafts Online: An Insider’s Guide to the Worldwide Arts Market
The Photographer’s Quick Guide to Earning Money From Your Photos
Your Redbubble Shop
Do you already sell your artwork or photography on Redbubble?
If so, let’s hear about it via the comments below. We’d love to view your work. And we would welcome any additional tips you have for others regarding how to sell on Redbubble.
Great tips! My redbubble is gweenbean so check me out!
Thanks Gweenbean, you have some nice bright designs on Redbubble.
Thanks for this article. Funnily, it’s always my cards that sell on RB. Not that I’m complaining. I love designing cards!
If I were to share a tip, I would say, think about whether your artwork suits the product.
I’m here: http://www.redbubble.com/people/leonahussey/shop
Thanks for the links to photography books. I’ll check them out.
Hi Leona,
Your mugs are looking good as well.
Have you tried other products, such as t-shirts on your Redbubble site?
Your tip, re. making sure that the artwork suits the product, is so important.
Thanks for stopping by.
Thank you for this article you just gave me a push to start working on it! I have never tried selling anything online so this was very helpful!
I’m new to all of this, so it was really helpful. I still have trouble reaching out my shop on redbubble. I’m still learning the ropes, but hopefully I make a sale one day.
My Link is here: http://www.redbubble.com/people/mrcakehat
Thanks for the tips! I just set up an account with some pictures of my pug puppy. We have a ton of them and seeing him on a cell phone case or coffee mug is just hilarious! Check out what we have so far:
Very cute!
testing